Showing posts with label reuse. Show all posts

Thursday, September 26, 2013

Nelves by Joni

My last several posts have been on saving and making money, something we all need to do, so I thought it was time that I flipped back over to the re-purposing/recycling part of my blog.

I want to introduce you to Nelves, The Nature Loving Elves by my friend Joni. She started making these a short while ago as a way to try and get an income and they have taken off.
Nelves Nature Loving Elves! Nelves help Mother Nature look her best! Hand made and no two are exactly the same.
Nelves are fun
They laugh, they play
They take care of nature in a really great way!
They talk to the trees, the bears and the bees.
They make flowers grow and help rivers flow
They take care of the fish and the birds
The ocean and the forest
The mountains and deserts
The parks and fields
They live in the tree in the middle of a field
In the coral in the ocean
In the park and the city
They can’t be seen but they are there
Helping nature happily
Don’t think they are rude
They don’t mean to intrude
But they can’t help but stop in your garden
To give an encouraging word to the things that you grow
Just wanted you to know
They are here now to ask for your help
You can help in so many ways
Little things really, but they pile up in a hurry.
Pick up the garbage, the can and the wrapper.
Throw out that garbage! Recycle that box!
Reduce, reuse and recycle all that you can!
One last thing they ask and it’s not hard at all
Plant a seed, plant a garden of veggies or flowers
Plant a tree for the future
Help them grow
The Nelves say thank you!

To get your very own Nelve contact Joni
Phone (920) 252-9072
Email Nelvesbyjoni@gmail.com


Enhanced by Zemanta

Monday, June 10, 2013

Reuse cardboard instead of Landscaping Cloth


English: Aged mulch of coarse home compost Cat...
Aged mulch of coarse home compost Category:Compost (Photo credit: Wikipedia)


Last week I told you about using plastic bags as a landscaping cloth.

There is a better alternative that will save you money and in the end is better for the environment and your garden.

It's commonly referred to as the lasagna method. Cover the ground with carboard, preferably the single layer stuff like a cereal box then cover the cardboard with 2 or 3 inches coarse organic mulch such as wood chips or bark. Layers of newspaper will also work. This will last about a year. To continue, simply add another layer of cardboard and another 2" coarse mulch. The organic materials will gradually decompose and enrich the soil while feeding your plants. A good mulch will let water percolate down, slowly decompose to improve the soil, and prevent weeds from sprouting.

The point of mulch is to prevent light from reaching the soil -- light activates the weed growth. That's why you lay a solid mass of paper or cardboardover the soil. Bark and wood chips are slow to decompose, thus lasting for about a year. Shredded dry leaves will usually decompose in 6 to 9 months.

The occasional wind-blown seed will take root on top of the mulch but young weeds are easy to pull up.


Enhanced by Zemanta

Monday, March 25, 2013

Re-use Clear Plastic Containers

You pick up some donuts or even some blueberries and you have these clear plastic clam shell containers. Instead of tossing them in the recycle bin why not wash them and put them aside to use in the spring. I have found that these are fantastic mini-greenhouses for your future garden.

I put a little bit of dirt in them and then my seeds and water. None of them close completely and many of them already have drainage holes, so I close them up to keep a nice green house effect going.  When the moisture build up too much I open them for a few hours. I find that these are great to get the plants going and they keep the bugs and birds from picking at your seedlings.


The Great Spam Project - A blog all about Spam (the email type, not the edible)
Ghost of a Writer - My Personal Blog
Killer Teacup - My Online Portfolio

Enhanced by Zemanta

Friday, March 15, 2013

Money Saving Tip #7

Homemade wood polish


I have a lot of wood in my house. Years ago when we bought our house we did not have a child and at that point we decided that we would slowly buy good furniture we liked, rather than going out to fill the house with cheap crap.

So we have a lot of wood in our house, our living room, bedroom, dining room, breakfast nook and library all have a lot of wood. We even redid one of the hallways with wood trim. Then we had a child. It makes me grateful that I like distressed wood, because since the child came along the wood has gotten even more distressed.

I don't like chemicals, so even before the child came along I was using this and it does a beautiful job protecting and cleaning the wood. It also does a wonderful job eliminating water and heat marks.

Furniture Polish

1 Cup white vinegar
1/4 Cup oil (I like olive, but almost any of them will work, some like to use almond oil)
Put it in a spray bottle with a fine mist and shake well before using.

The vinegar acts as the cleaner and will help remove anything while the oil will moisturize and protect. Just clean with a soft cloth and let it dry.
  
If you have water marks on the wood, then let the oil/vinegar mix sit on the mark for a while and you should be able to rub it out, if it doesn't leave then I have found that mayonnaise works,there is also a hot iron method for tougher stains.

If you don't like the smell of vinegar then you can also use a cup of the citrus cleaning solution instead of straight vinegar


The Great Spam Project - A blog all about Spam (the email type, not the edible)
Ghost of a Writer - My Personal Blog
Killer Teacup - My Online Portfolio


Food Network Oil And Vinegar Dispenser (Google Affiliate Ad)

Tuesday, February 19, 2013

Repurpose Those Old Juice Pouches

Re-use Those Old Juice Pouches


I had seen bags and purses on various websites, but it never occurred to me that they were actually made form the old juice pouches. I thought it was just some fancy fabric or a promotion that the juice companies had done. I think this is awesome.

Reposted from Thriftyfun

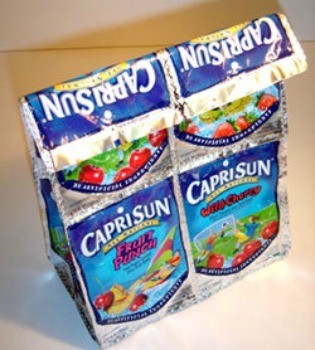
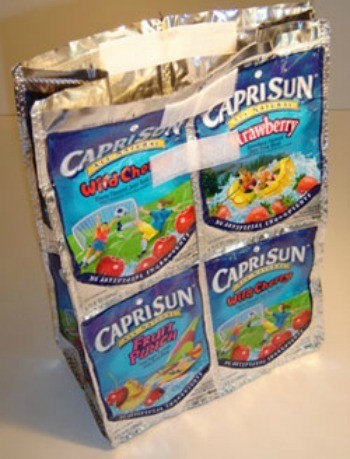
This lunch bag is easy to make and durable. It makes great use of Kool-Jammer or Capri Sun pouches.Finished CapriSun lunch bag

Supplies:

  • 14 Capri Sun or Kool-aid Jammer juice pouches
  • X-acto knife
  • Sticky End Velcro
  • Sewing machine and thread
  • Scissors

Preparation:

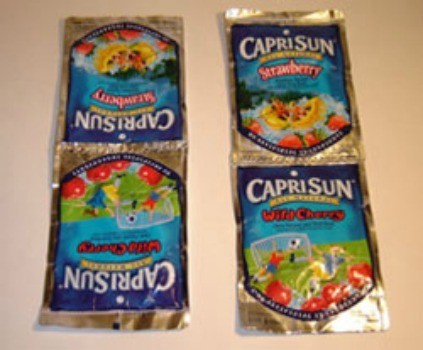
After the juice has been drank use an x-acto knife to slit the bottom of the juice pouch.
Clean the inside of each pouch with hot soapy water and let dry.

The Front and Back:

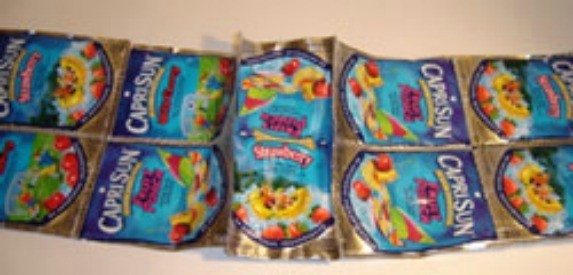
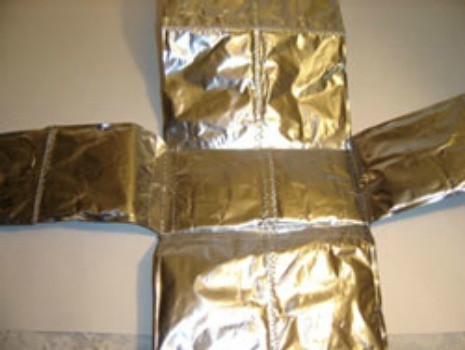
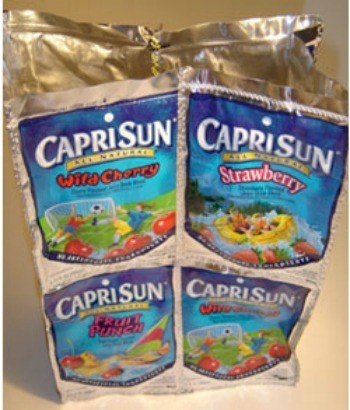
Take four juice pouches and sew them together 2 by 2.Juice Pouch Lunch Bag
Do the same with four more juice pouches, having two sets of four. These are the front and back of the bag.

The Sides:

Sew two juice pouches together, one above the other, two tall one wide.
Do the same to two more juice pouches, have two sets of two. These are the sides of the bag

The Bottom:

For the bottom of the bag you will need to determine how long it will need to be by taking two juice pouches and laying them next to shorter side of the set of four juice pouches. Instead of having one juice pouch full size and having a small part of another showing for the bottom I layed them on top of each other and sewed down the middle of them both to make it the appropriate length. Then I cut off the extra bit, leaving approximately and 1/2", then sewed that end down flat.

Putting It All Together:

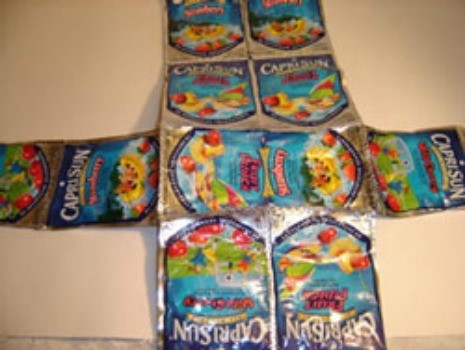
The next step is to sew the bottom to one of the sets of four.
Once you have done that sew the other set of four to the other side.Juice Pouch Lunch Bag
Next sew one of the sets of two to the bottom, then the other.
Now sew all the ends together, the front to the sides and the back to the sides.Juice Pouch Lunch BagJuice Pouch Lunch BagJuice Pouch Lunch Bag

Finishing:

Add a piece of velcro to the top inside of the bag.
Fold over the top of the bag approximately an inch and a half, then place another piece of velcro under the fold.Juice Pouch Lunch Bag
Now your lunch bag is complete, everyone will be impressed by your creative recycling


Friday, February 8, 2013

Repurpose old Grocery Bags

Save those old grocery bags, especially around Christmas time because they are perfect to use as packing material or to wrap around lights and garland. Use the old bags as ties to help you keep the garland and lights organized and tangle-free.

Reuse Grocery Bags as ties to keep your garland and ornaments from getting tangled in storage.

100_3901
Plastic shopping bags are perfect packing material, because they can be formed around anything to create a protective layer and they won’t leave news ink like old newspapers.
Enhanced by Zemanta

Monday, January 21, 2013

Repurpose Old Picture Frames


Turn Old Picture Frames Into Serving Trays

Turn Old Picture Frames Into Serving Trays

This isn't something I've done yet, but I like the idea and I will probably do it if and when I have unused picture frames. At least if I haven't put new pictures in them already.


Be sure to check out my other blogs;
The Great Spam Project - A blog all about Spam (the email type, not the edible)
Ghost of a Writer - My Personal Blog
Killer Teacup - My Online Portfolio


Monday, January 14, 2013

Repurpose old cardboard tubes


Reuse old cardboard rolls from Toilet Paper, Paper Towels and Wrapping Paper to Organize Cables and Cords.


Reuse Toilet Paper Rolls to Organize Cables and Chords
Enhanced by Zemanta